How to Take Professional Headshots With Your Phone (2026 Guide)
Learn to take professional headshots at home using your phone. Step-by-step guide with lighting, posing, and framing tips — no studio needed.
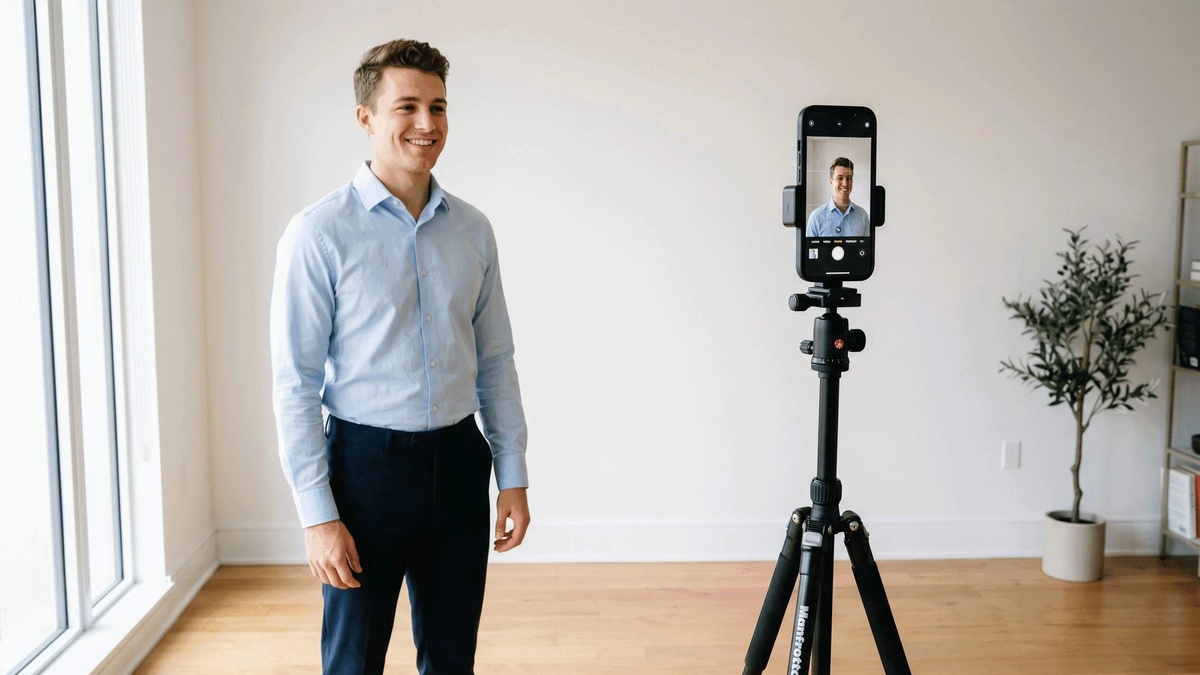
Table of Contents
TL;DR — Quick Summary
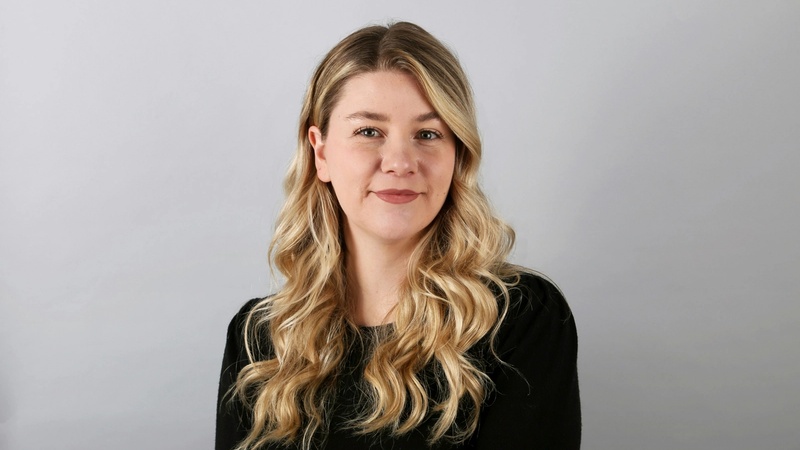
Yes, you can take a professional headshot with your phone.
Find good natural light, use your rear camera, clean your lens, and stand about 3–4 feet from a simple background.
Focus on soft lighting, flattering angles, and natural expression.
Avoid zoom, harsh light, and cluttered backgrounds.
The trick isn’t the camera — it’s lighting, framing, and confidence.
You Don’t Need a DSLR
Phones have come a long way. The latest iPhones, Pixels, and Samsungs shoot in 12MP+ with portrait depth sensors — that’s more than enough for a LinkedIn photo, website bio, or even printed business profile.
According to Statista, over **80% of **professional LinkedIn photos uploaded in 2024 were shot on mobile.
What matters now isn’t the gear — it’s how you use it.
Lighting, angles, and your vibe are what make a photo feel professional.
Step-by-Step: How to Take a Professional Headshot at Home (With Your Phone)
Step 1. Find Your Light
Good lighting is everything.
You can have the best outfit and the fanciest phone, but bad light will destroy all of it.
- Use natural light from a window — not direct sunlight.
- Face the window (not sideways).
- Turn off overhead lights — they create ugly shadows.
- Avoid shooting after sunset (warm bulbs distort skin tones).
💡 Pro Tip: If sunlight is too harsh, hang a white bedsheet or sheer curtain to diffuse it—instant softbox.
Step 2. Choose a Simple Background
Clean backgrounds make faces pop. You don’t need a photo studio — just a wall that doesn’t steal attention.
Best backgrounds:
- Plain white, gray, or beige wall
- Curtains
- Light-colored brick or textured surfaces (minimal)
- A blurred outdoor hedge or fence

Avoid:
❌ Busy shelves, plants, or furniture.
❌ Wallpaper or anything with patterns.
❌ Being too close to the wall — step out about 2–3 feet for depth.
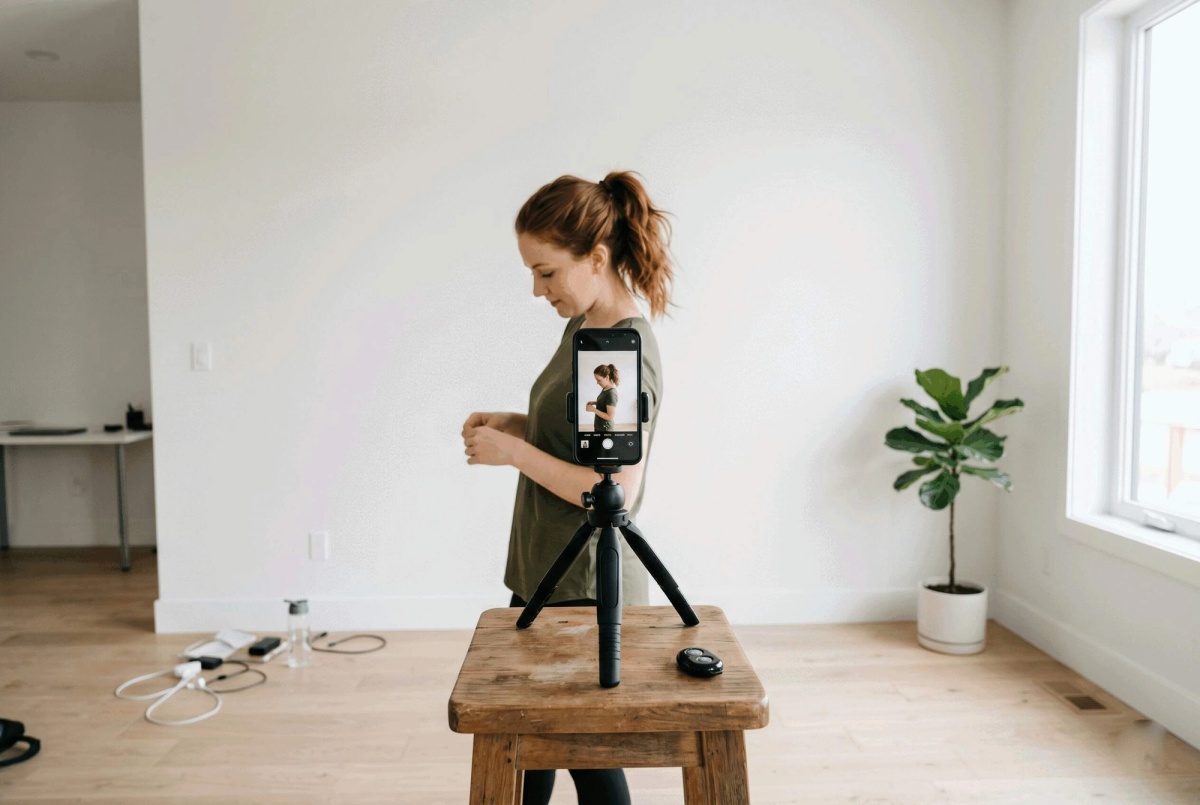
Step 3. Set Up Your Phone (Correctly)
Here’s where most people mess up — not the outfit, but the setup.
- Use the rear camera (it’s higher quality).
- Use a tripod or a stack of books at eye level.
- Clean your lens (yes, it matters).
- Turn off filters or portrait “beauty” modes — they can blur detail unnaturally.
- Use grid lines (in camera settings) to align your eyes at the top third of the frame.
- Tap your face on screen to focus and hold exposure for even lighting.
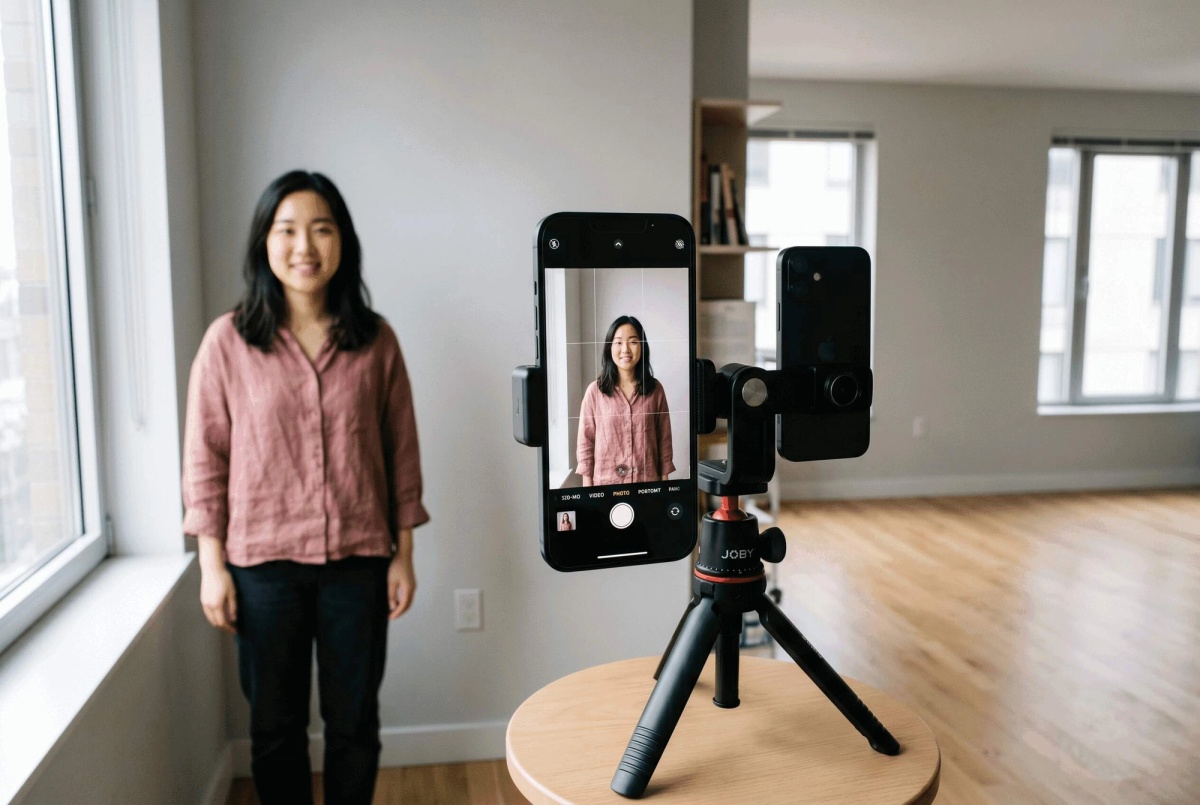
💡 Pro Tip: If your phone allows, use the portrait mode or Pro mode and lower the aperture (f/2.0–f/2.8) for natural background blur.
Step 4. Frame It Right
Framing is the difference between a selfie and a headshot.
You want a “shoulders-up” shot that feels natural and confident.
- Keep the phone at eye level, not below your chin.
- Include the upper chest and shoulders in frame.
- Leave a bit of space above your head.
- Don’t crop too tightly.
- Avoid shooting from an upward or downward angle.
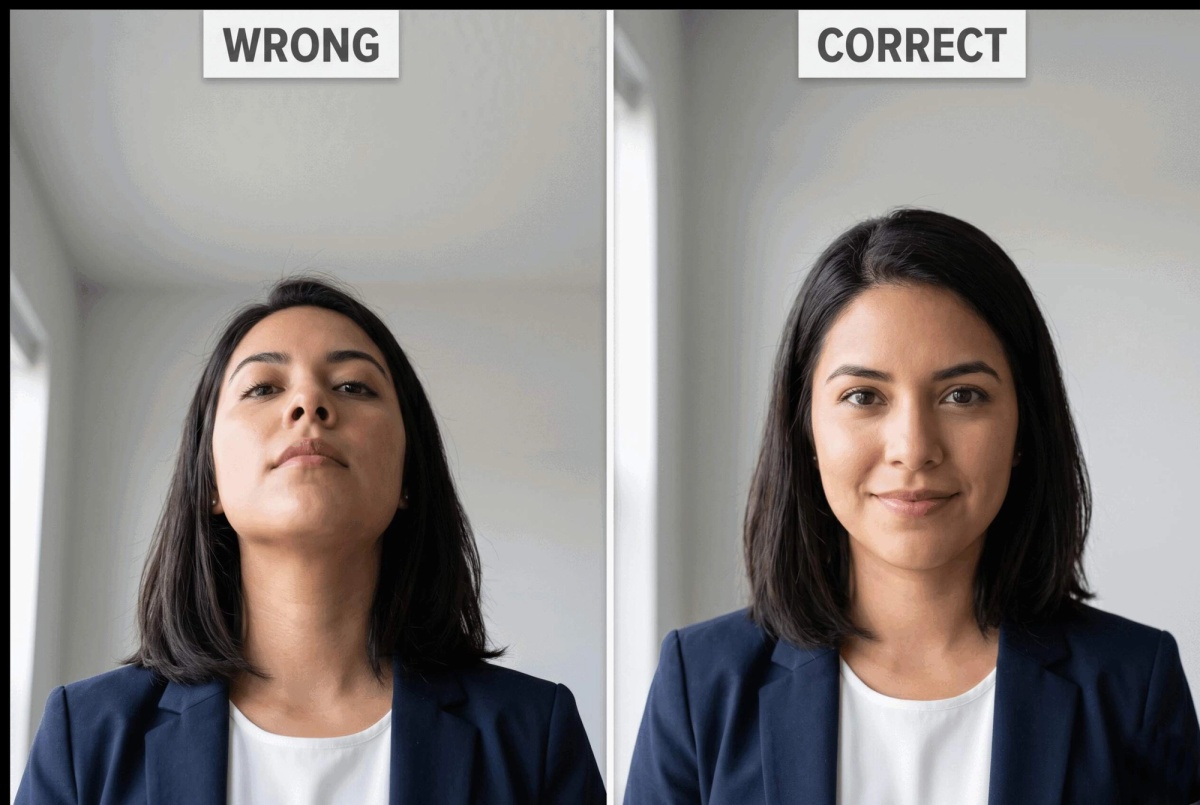
🎯 Think: "Professional portrait, not passport photo."
Step 5. Pose Naturally
People often freeze in front of the camera. The trick? Don’t overthink it.
- Roll your shoulders back, then relax.
- Slightly angle your body (not straight-on).
- Keep your chin parallel to the floor.
- Smile gently — not forced.
- Try both serious and approachable expressions.
💬 My tip: Think of someone you like before the photo — it softens your eyes naturally.
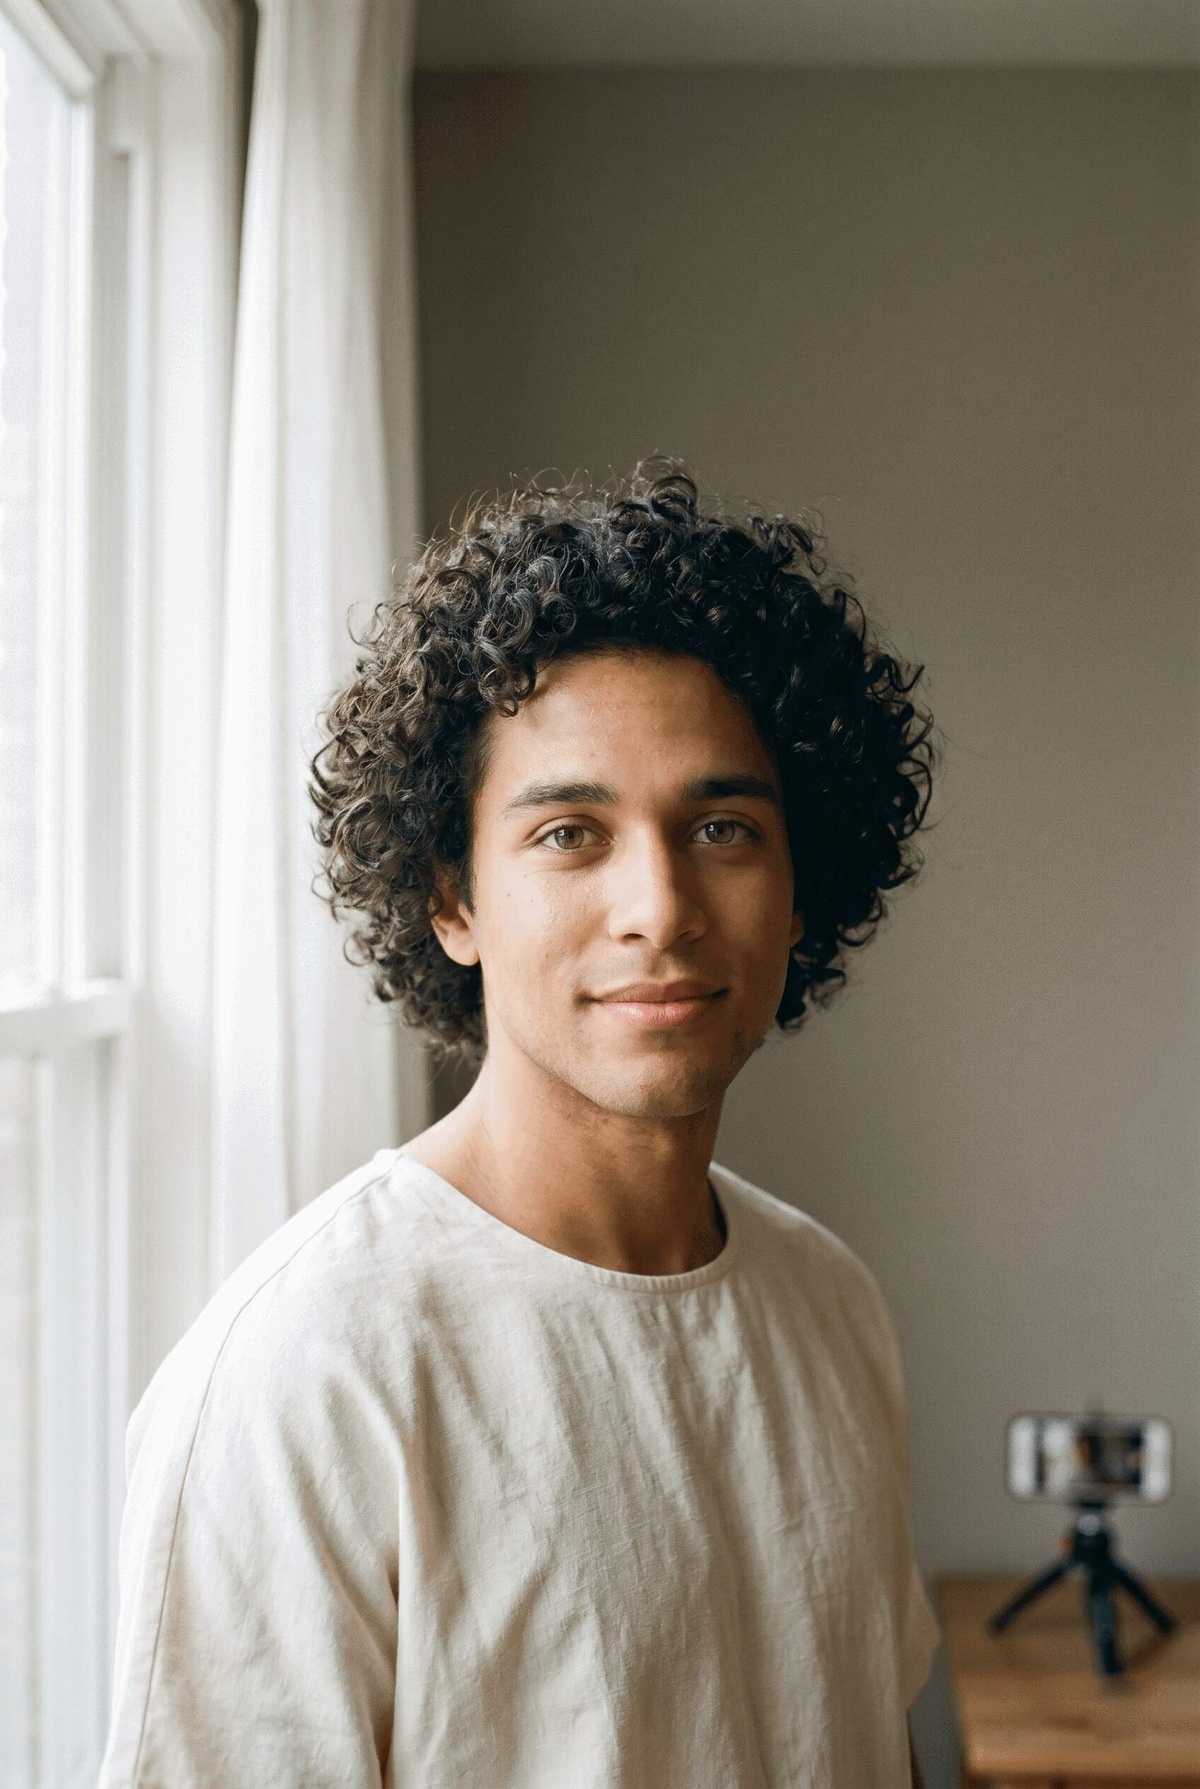
Step 6. Outfit and Details
We already have a full guide on what to wear and professional headshot examples.
Here’s a quick recap:
- Solid colors only
- Avoid loud patterns or shiny materials
- Mid-tone shades work best
- Keep accessories minimal

🪞 Final check: Iron your clothes, brush stray hair, wipe glasses, check for lint. The camera sees everything.
Step 7. Take Multiple Shots
Never stop at one.
Take at least 20–30 photos with slight angle, distance, and lighting variations.
Phones make this easy — experiment freely.
Try:
- Facing the window straight-on
- Turning slightly sideways
- Different expressions (neutral, smile, confident look)
💡 Pro Tip: Check photos on a laptop screen, not just on your phone — imperfections show differently on bigger screens.
Step 8. Edit Like a Pro (But Keep It Natural)
Editing should enhance, not disguise.
Use free apps like:
- Snapseed (for lighting and color correction)
- Lightroom Mobile (for contrast and highlights)
- Canva or Fotor (for simple retouching and cropping)
Avoid:
❌ Over-smoothing skin
❌ Overexposing faces
❌ Fake “bokeh” effects that look cut-out
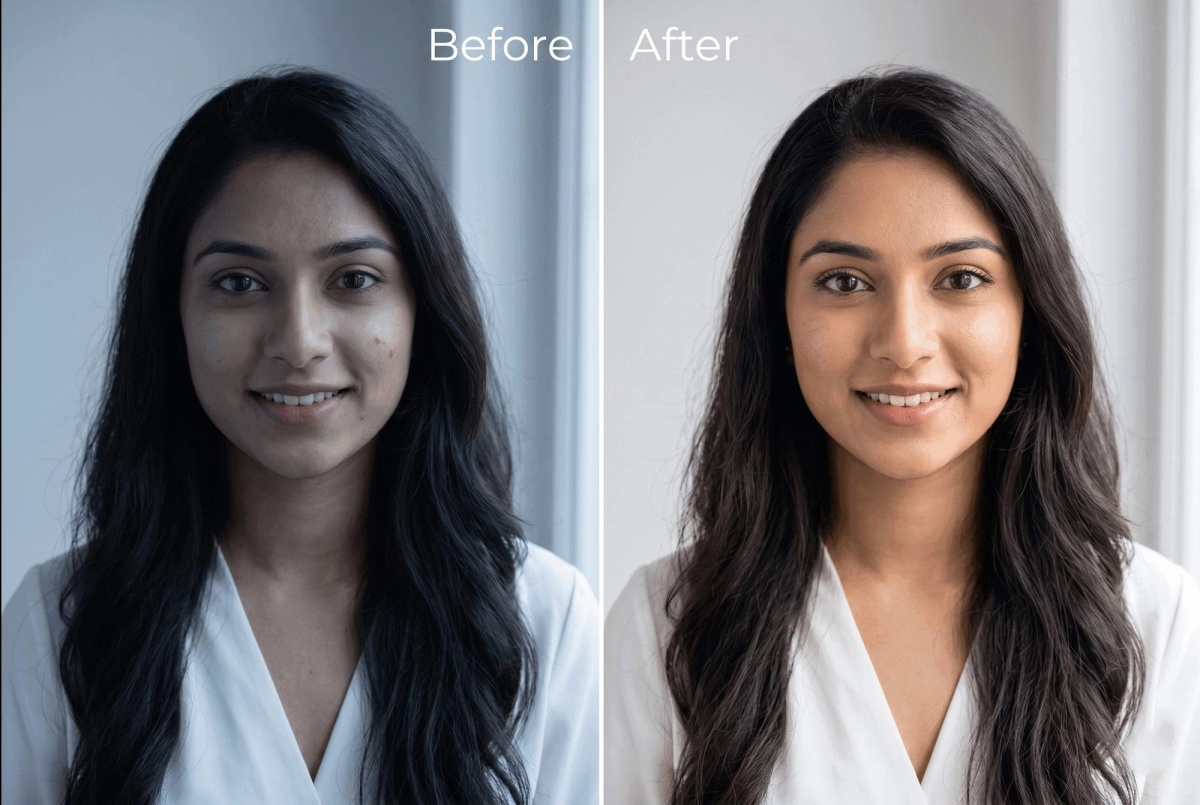
🎨 Editing checklist:
- Increase brightness slightly
- Boost contrast a touch
- Warm up the temperature if the lighting looks too cold
- Crop for symmetry (center your eyes at the top-third gridline)
Step 9. Choose the Best Photo
Look for these cues:
- Clear focus on your eyes
- Natural lighting, no shadows on the face
- Confident, genuine expression
- Balanced composition
Ask a friend to pick their favorite — people see your photo differently than you do.
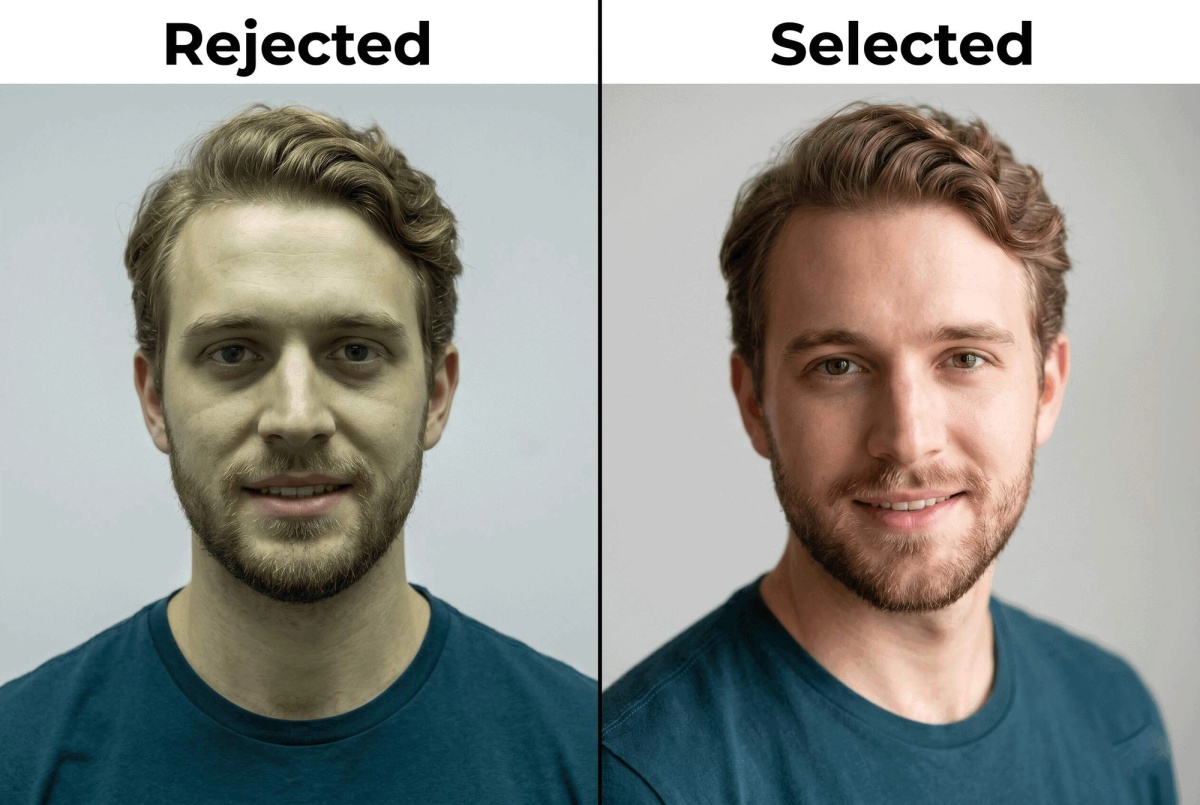
Step 10. Optional: Use AI for Final Polish
Now that you’ve nailed the basics, you can create professional headshots from your regular photos with AI (without faking it).
Tools like Proshoot can adjust lighting, background, or outfit tone — keeping your likeness intact.
Common Mistakes to Avoid
- Shooting too close to the wall
- Standing under direct sunlight
- Using the selfie camera
- Forgetting to clean your lens
- Over-editing or adding filters
- Choosing loud outfits or messy backgrounds
✅ Final Headshot Checklist
- Clean phone lens
- Rear camera, not selfie
- Natural light source
- Neutral background
- Eye-level framing
- Shoulders relaxed
- Solid-color outfit
- Subtle editing only
💬 Final Thoughts
You don’t need a $1,000 photoshoot or fancy gear.
With your phone, good light, and a few small tweaks, you can take a photo that looks polished, confident, and professional.
Because the truth is — people don’t connect with perfect. They connect with authentic confidence.
So open that camera app, face the window, and show the world the version of you that’s ready to be seen.

Rajat
Founder
Rajat is the founder of Proshoot, an AI headshot platform used by professionals across finance, law, healthcare, real estate, technology, and creative industries. He writes about headshot photography, brand imagery, and the technical side of AI image generation.